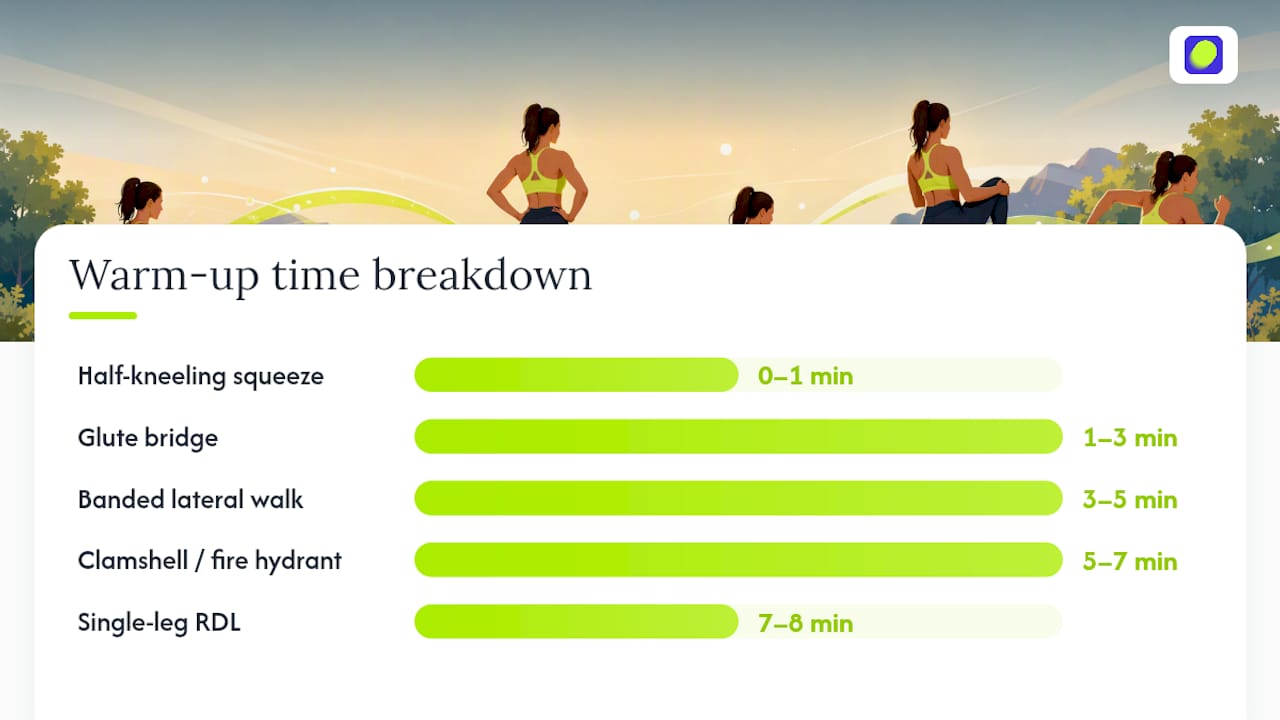
The most reliable glute activation warm up takes about 6 to 8 minutes: 30 seconds per side of half-kneeling glute squeezes, 2 sets of 10 to 12 glute bridges with a 2 second hold, 2 sets of 12 banded lateral walks each direction, and 1 set of 8 single-leg dynamic RDLs per side. Do it before every run or leg session. If you sit most of the day, a shorter 5 minute version works well as a daily “wake up” call for your hips.
TL;DR:
Here’s the thing about most warm-up routines: they either take forever or they skip the parts that actually matter. This one is built to fit into a normal training day without eating into your workout.
Here’s how the full 6 to 8 minute version breaks down:
That sequence follows a logic: wake the nervous system first with an isometric hold, build a pump with bridges, then shift to lateral and single-leg work that mimics how your hips actually move when you run or squat. A practical 6 to 8 minute protocol built around exactly these movements is designed to activate the glutes without draining them before the real work starts.
If you’re short on time, reduce it to a shorter micro-protocol including half-kneeling squeeze, one set of bridges with a hold, and one set of banded lateral walks. It’s not as thorough, but it beats skipping activation entirely on a rushed morning.
Got 12 minutes or more? Add a set of donkey kicks and a hip hitch drill (more on that below), and slow your tempo down across the board. More time doesn’t mean more sets. It means more control.
For lifting days, run this warm up right before your first lower-body exercise, not 20 minutes before you even get to the gym, as detailed in this coach & parent guide on warm-up role in youth sports. For runs, do it 5 to 10 minutes before you head out the door so the activation is still “live” when your feet hit the pavement.
Pro Tip: Keep every rep in this warm up sub-maximal. You want your glutes firing, not fatigued. If your legs feel heavy or shaky afterward, you did too much.
Doing an exercise and doing it correctly are two different things, and the gap between them is usually where people give up on activation work altogether. Here’s how to nail the ones that matter most, plus the compensation pattern to watch for on each one.
Bands earn their place mainly with lateral work. Clamshells and lateral walks target the gluteus medius and minimus, the muscles responsible for hip stability during running, and a light loop band or mini-band adds resistance in exactly the direction those muscles need to resist. Bodyweight work, on the other hand, is usually enough for early-phase “neural wake” drills like the half-kneeling squeeze, since the goal there is reconnecting your brain to the muscle, not overloading it.
If you’re picking a band, start light. A band that’s too heavy will pull your form apart before your glutes get the memo. A beginner band plan is a solid place to start if you’ve never used one before and want a simple ramp-up.
Pro Tip: Can’t feel a clamshell doing anything? Slow it down to a 3 second lift and a 3 second lower. Speed is often what lets weaker muscles hide behind momentum.
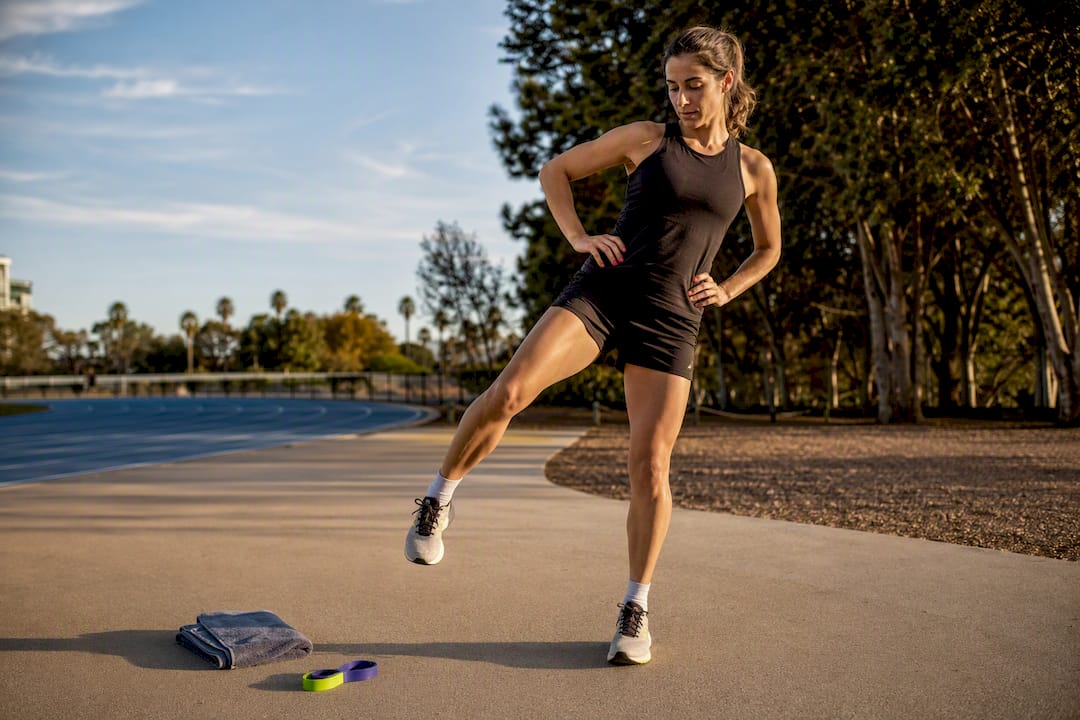
Running rewards hip stability more than almost any other sport, and a warm up that only works lying on the floor doesn’t automatically translate to standing on one leg at an 8-minute-mile pace. Runners get the most out of drills that mirror an upright, single-leg position.
Try this order before your next run:
Do these before your stride drills and form work, not after. Activation should come first, dynamic stretching and running-specific drills second, and easy strides last, right before your run begins. That order keeps the activation “fresh” when it matters most.
Runners who deal with nagging IT band discomfort or a hip that seems to collapse inward on one side often trace it back to underworked lateral glutes. The lateral gluteal muscles act eccentrically at foot strike, meaning they’re absorbing force every single stride, not just stabilizing it. Hip hitches and single-leg bridges target exactly that mechanism, which is why they show up first in this sequence rather than as an afterthought.
Activation work isn’t meant to stay small forever. It moves through phases, and knowing which phase you’re in keeps you from either underdoing it or accidentally turning your warm up into a second workout.
A short daily “wake” protocol prioritizes repetition over load, which is exactly what builds the motor pattern you need before adding real resistance later. The most common mistake is skipping straight to heavy loaded work without ever building that pattern, or on the flip side, doing so much activation volume that you’re tired before your actual workout starts. Two to three sets of 10 to 15 reps is the sweet spot. If your legs feel pumped or shaky heading into your main lift, cut the volume, not the movement.
Electromyography, or EMG, measures electrical activity in a muscle during movement, and it’s the closest thing we have to proof that a given exercise actually fires the muscle you think it does. The findings are genuinely useful, but they come with real limits worth understanding before you build your whole routine around one study.
Hip thrusts tend to produce higher peak gluteus maximus activation than bridges or back squats for many people, according to EMG comparisons cited by biofeedback researchers. That doesn’t mean bridges are useless. It means hip thrusts are often the stronger isolation tool once you’re ready to load the movement, while bridges remain a great lower-fatigue entry point.
That last point matters more than people realize. Activation that doesn’t show up in your next set or your next stride isn’t doing its job, no matter how good it felt on the mat.
Sometimes you go through the motions of a squat or a bridge and just don’t feel your glutes doing anything. That’s not a mystery, and it’s usually fixable in the same session.
Watch for these signs:
If any of that sounds familiar, try these fixes before you write off the exercise entirely:
Chronically tight hip flexors from sitting are a common root cause here, since they can inhibit glute firing through simple reciprocal inhibition. A few minutes of hip flexor mobility work, like what you’d find in a coach-led mobility flow, before your activation drills can make the rest of the routine click.
Pro Tip: If you’ve tried every fix here for a few weeks and one side still won’t fire, that’s worth a session with a physical therapist or certified coach rather than more solo troubleshooting. Persistent asymmetry is usually a mechanical issue, not a motivation issue.
Knowing the right drills is one thing. Doing them consistently, on the days you’re tired or rushed, is the part that actually changes how your body performs. That’s where a lot of good intentions quietly fall apart.
Onemor is built for exactly that gap. Every guided session comes with sets, reps, and rest timers built in, so a glute activation warm up like this one isn’t something you have to remember or calculate on the fly. It’s just the first block of your workout, already programmed. If you’re new to structured training, a beginner leg day routine walks you through a full session with activation built in from the first minute, and coaches like Coach Kayla and Coach Branden cue these exact movements so you’re not guessing whether your form is right.
The part that actually keeps people consistent is the streaks, XP, and tribe challenges that turn a solo warm up into something you’re doing alongside friends. If you want that structure and accountability built around your own goals, find your program and let Onemor handle the sets, reps, and timing while you focus on feeling your glutes actually fire.