Most squat knee pain comes from patellofemoral overload or weak hip control rather than anything structurally wrong with your knee. The right immediate move is to reduce your squat depth and load right away, add relative rest, and start targeted glute and quad activation. With a guided progression over the next few weeks, most people see real relief and get back to full squats stronger than before.
TL;DR:
- Reducing squat depth and load, along with targeted glute and quad activation, is essential for relief and rebuilding strength within 4 to 6 weeks.
- Pain during squats often peaks between 60 and 90 degrees of flexion, with common causes including muscle imbalances, mobility limits, and technical faults like knee valgus.
- Immediate adjustments such as lowering range of motion, modifying activity, and avoiding sharp joint pain support recovery without halting progress entirely.
- A phased program focusing on muscle activation, controlled loading, and progressing to single-leg work effectively restores full squats while minimizing knee stress.
- Long-term prevention involves gradual load increases, consistent warm-ups, and careful monitoring of soreness versus pain, with serious symptoms warranting medical evaluation.
Your knees take on more stress the deeper you squat, and that’s not a coincidence. A systematic review of squat-related knee pain found that patellofemoral joint forces climb as the knee bends, peaking somewhere between roughly 60 and 90 degrees of flexion. That’s exactly the range most of us pass through on a working set, which explains why pain so often shows up mid-rep rather than at the top or bottom.
Patellofemoral pain syndrome, often shortened to PFPS, is one of the most common culprits behind that ache around or behind the kneecap. It’s rarely one single thing. It’s usually a combination of factors stacking up at once.
Here’s a distinction worth making early: muscle soreness and joint pain feel different, and mixing them up leads to bad decisions. Soreness is a dull, diffuse ache in the muscle belly that eases as you warm up and fades within a day or two. Joint pain tends to be sharper, more localized around the kneecap or joint line, and it often gets worse, not better, as you keep moving. If what you’re feeling matches the second description, that’s your cue to adjust rather than push through.
Small technical habits change how much stress lands on your knee joint. A few visual and movement checks can help you spot what’s going wrong before it becomes a bigger issue.
The old “knees should never pass your toes” rule oversimplifies things. The real drivers are how deep you go, how much you’re lifting, and whether your muscles are balanced enough to control the movement, not the position of your knee relative to your foot on its own.
Pro Tip: Film your squat from the side on your phone. Watching your trunk-to-shin angle and knee travel in slow motion often reveals more than how the rep feels in the moment.
You don’t have to stop training while your knee settles down. ACSM guidance on injury recovery favors modifying activity over stopping completely, since staying moderately active tends to support recovery better than full rest.
Think of this phase as pressing pause on intensity, not on progress. You’re keeping your fitness alive while giving the joint room to settle, which sets up everything that comes next.
A structured, phased plan gives your knee a clear path back to full squats. Clinical recommendations support a 4 to 6 week program that emphasizes quad and hip strengthening to reduce valgus and patellofemoral stress, and that’s exactly the shape this plan follows.
Phase 1, weeks 0 to 2: calm it down and wake up the right muscles. Focus on glute activation drills like clamshells and band walks, isometric quad holds against a wall, and ankle mobility work. Add two-legged squats limited to a 0 to 50 degree knee angle, which keeps patellofemoral load low while you rebuild movement quality. Aim for 2 to 3 sessions a week, 2 to 3 sets of 10 to 15 reps for activation work, and 20 to 30 second holds for isometrics.
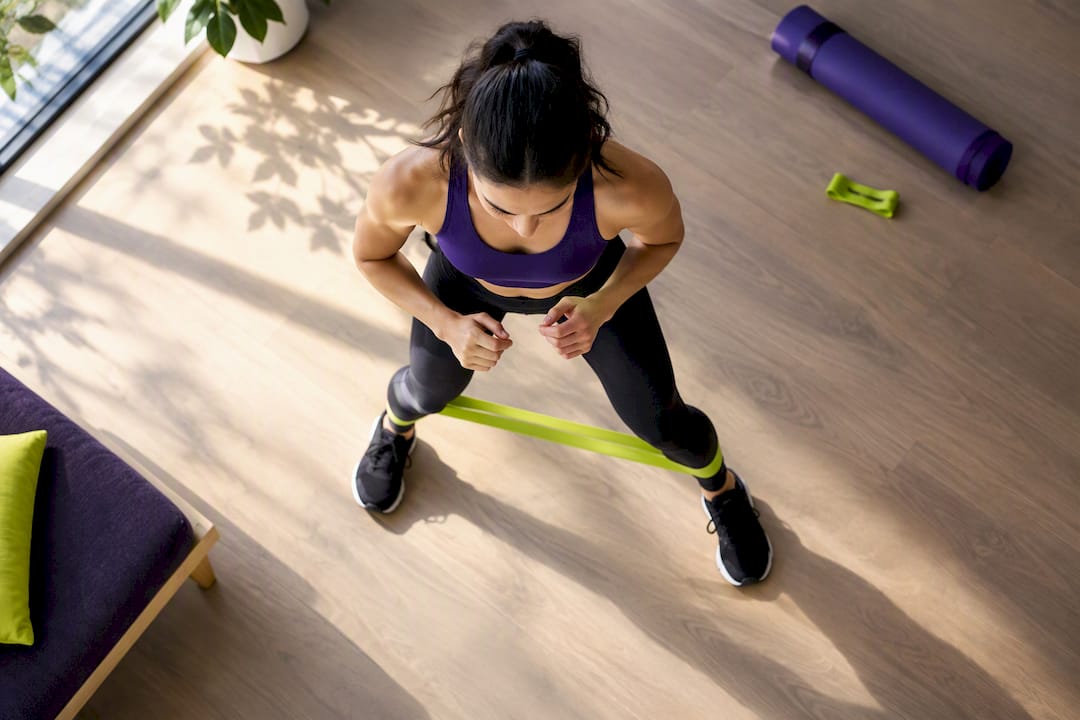
Phase 2, weeks 2 to 4: add load, keep it controlled. Progress to loaded two-legged squats at a controlled, moderate depth, along with banded lateral walks for the hip abductors. Bring in hip thrusts and Romanian deadlift variations to build the posterior chain, since a stronger backside takes pressure off the knee joint during every squat rep. Work at 3 sets of 8 to 12 reps, still 2 to 3 times a week, and only add weight when the previous session felt fully pain-free.
Phase 3, weeks 4 to 6: reintroduce full range, one leg at a time. Start single-leg progressions such as split squats or step-ups, and only return to deeper two-legged squats if you’ve stayed pain-free through Phase 2. Research on patellofemoral loading across squat variations shows a practical way to sequence this: move from stable, low-angle, two-legged work toward less stable or single-leg positions, since each step up raises joint demand in a predictable, manageable way.
Pro Tip: Keep a simple training log noting pain level, reps, and load each session. Patterns show up fast, and they’ll tell you when you’re ready to move on far more reliably than how you feel on any single day.
For structured warm-ups that fit right into Phase 1, a short glute activation routine before your session primes the right muscles before you load anything.
Getting through the 4 to 6 week plan is only half the win. Keeping the pain from coming back means building a few habits into how you train long term.
None of this requires overthinking every rep. It just means treating your knee as part of the plan, not an afterthought you deal with only when it hurts.
Most squat-related knee pain responds well to a few weeks of conservative, structured correction. Some signs mean it’s time to see a professional instead of waiting it out.
If any of those apply, a doctor or physical therapist will typically check your range of motion, strength, and joint stability before recommending a course of action. Orthopaedic sources note that patellofemoral pain usually responds well to non-surgical care, including activity changes, physical therapy, and targeted strengthening, so most people never need anything more invasive than that.
Running a corrective plan on your own can turn into a second job, tracking angles, counting weeks, second-guessing every rep. That’s exactly the kind of guesswork Onemor takes off your plate. Every session comes with structured guidance, so you’re not stopping mid-workout to check what’s next.
You can start with the Free plan to explore guided sessions, or move to Pro for deeper coaching support as you work through your 4 to 6 week reset.
This article is general information, not a substitute for advice from a qualified doctor. Consult a qualified healthcare professional about your own circumstances before acting on anything here.
An ACL tear from squatting alone is uncommon since the movement doesn’t typically involve the sudden pivoting or direct impact that usually causes that injury. Sharp pain paired with a popping sensation, swelling, or a feeling of instability warrants prompt evaluation by a clinician rather than assuming it’s routine knee soreness.
You generally don’t need to stop training altogether. Reducing depth and load, or switching to low-impact alternatives for a short stretch, tends to work better than quitting exercise entirely, based on current activity-modification guidance.
Deep, heavily loaded squats and any movement that pushes the knee through roughly mid-range flexion under high load tend to place the most stress on the patellofemoral joint, according to research on squat mechanics. Movements combining depth, speed, and heavy load, like jumping into a deep squat, generally carry more risk for an already irritated knee.
There’s no shortcut that speeds up ligament healing beyond what the tissue naturally allows, but supporting the process with structured strengthening, proper loading, and consistent movement gives it the best environment to recover. Orthopaedic guidance on knee exercises points to strength and flexibility work as the main tools for supporting joint recovery and preventing further injury.
Many people notice meaningful improvement within 4 to 6 weeks of consistent, phased corrective work targeting the quads and hips, based on clinical rehab recommendations. If pain hasn’t eased by then or red flags like swelling or instability show up, it’s time to see a clinician.