The most effective pushup progression moves in one direction: wall push-ups → incline variations (high to low) → knee push-ups → negatives → full push-ups → advanced variations. The single rule that governs every step forward is this: only advance when you can complete 3 sets of the target reps with controlled form and no compensation. Before anything else, take five minutes right now to do a simple baseline test (described in Section 3) so you know exactly where to start. According to biomechanics research published in the NSCA Strength and Conditioning Journal, knee push-ups reduce external load to roughly 49% of bodyweight compared with about 64% for a standard push-up at the top position. That gap is why regressions work: they let you build real strength at a manageable load before stepping up. The SAID principle (Specific Adaptation to Imposed Demands) explains the science behind it: your body adapts to exactly what you train, so the progression has to be deliberate and progressive. If you want a guided option that tracks every set and tells you when to advance, the Onemor app does exactly that.
Every level below has a clear target, form cues, and one criterion that tells you when you’re ready to move on. Work through them in order. Skipping levels is the fastest way to stall.
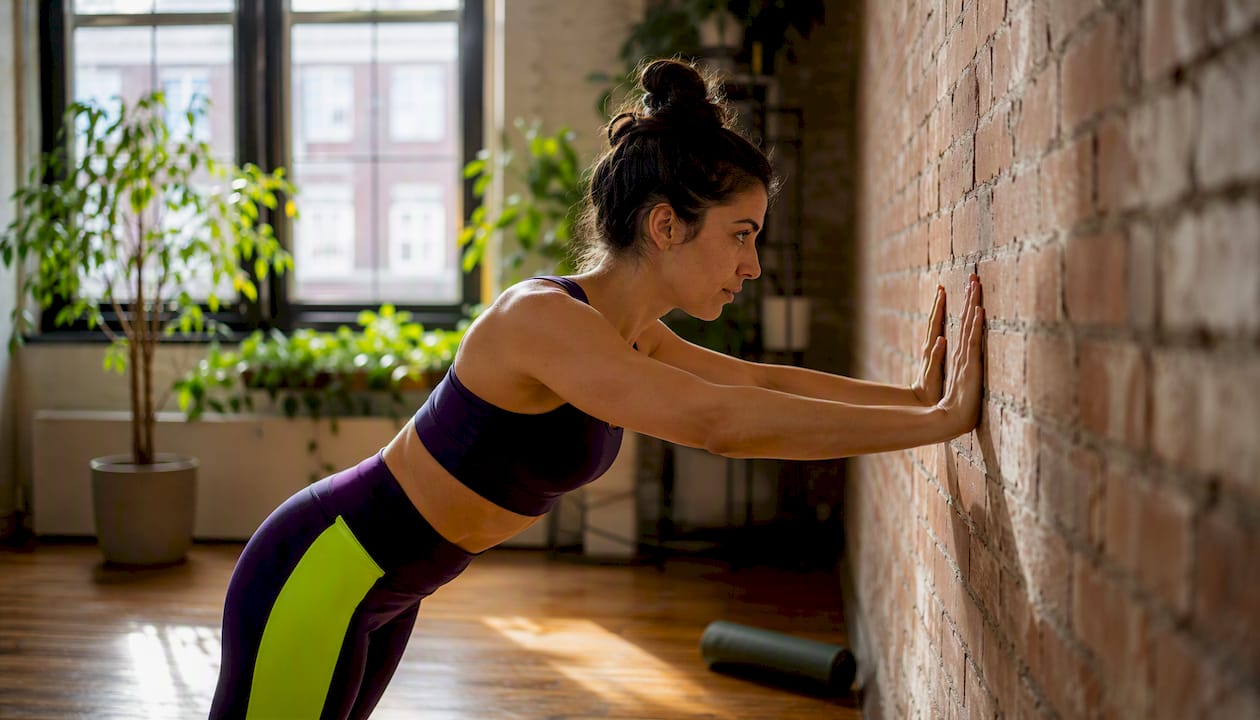
Stand about arm’s length from a wall, hands at shoulder width and shoulder height. Keep your body in a straight line from head to heel. Lower your chest toward the wall, then press back. This is the starting point for anyone who struggles with a plank hold or has significant upper-body weakness.
Target: 3 sets of 12–15 reps with a controlled tempo.
Advance when: You hit 3x15 with no shoulder shrug, no neck jut, and a full range of motion.
Start with a high surface like a kitchen counter or a sturdy box at hip height, then work down to a chair seat, then a low bench or step. The lower the surface, the closer you get to a standard push-up load. Healthline’s beginner push-up guide recommends this stepwise incline approach as the most reliable path to a first full push-up.
3 sets of 8–12 reps at each surface height.
“corkscrewing” your hands into the surface (imagine trying to rotate them outward without actually moving them) to create immediate shoulder stability.
Knees on the floor, hands at shoulder width, hips slightly forward of the knees so your body forms a diagonal line. This is not a “cheater” variation. At roughly 49% of bodyweight load, it’s a legitimate strength-building step. The mistake most people make here is letting the hips pike up or sag, which turns it into a different exercise entirely.

Target: 3 sets of 8–12 reps.
Advance when: 3x12 with a flat back, controlled descent, and full chest-to-floor range.
Start in a full push-up position (or from knees if needed). Lower yourself as slowly as possible, aiming for a 3–5 second descent. When you reach the floor, reset to the top and repeat. BarBend’s beginner push-up program highlights eccentric-focused work as one of the most effective ways to build the strength needed for a clean concentric rep. You’re building the muscle control to push yourself back up before you can actually do it.
3 sets of 5–8 slow negatives.
Full body, toes on the floor, hands just outside shoulder width. Lower until your chest grazes the floor, then press back to full arm extension. This is the goal for most beginners.
3 sets of 8–10 reps.
Neutral spine, chin tucked (not dropped), elbows at 45 degrees, glutes squeezed throughout.
Once you own 3x10 standard push-ups, you have options. Each variation shifts the load differently, which is exactly what the SAID principle predicts: new demands produce new adaptations.
Pro Tip: You don’t need to change levels to make a variation harder. Add a 2-second pause at the bottom of any level, slow the descent to 4 seconds, or elevate your feet slightly. These changes increase time under tension without requiring a new movement pattern, which is ideal when you’re close to but not quite ready for the next level.
Don’t guess your starting point. A five-minute test tells you exactly where to begin, and logging the result gives you a benchmark to measure progress against.
Stand at arm’s length from a wall and do as many controlled wall push-ups as you can without losing form. If you can’t reach 10 clean reps, start at Level 1. If 15 feels easy, move straight to high-incline.
Find a surface at roughly hip height (a counter or sturdy table). Do as many incline push-ups as you can with strict form: no hip sag, full range, elbows at 45 degrees. Here’s how to read the result:
If you can do 3 sets of 8 knee push-ups with a flat back and controlled tempo, try one set of full push-ups. If you collapse before reaching the floor or your hips sag immediately, spend another week on negatives before retesting.
Most beginners move one major level in 4–8 weeks with consistent practice (2–3 sessions per week). Intermediates who already have some upper-body strength often progress faster, sometimes in 2–4 weeks per level. Individual variance is real: sleep, nutrition, and training history all affect the rate. What matters more than speed is the quality of each rep at every level. A systematic review of push-up kinetics covering 46 variants confirms that load and intensity differ meaningfully across variations, which is exactly why moving too fast through levels produces poor results.
Log your baseline test result today. The Onemor app makes this easy with built-in tracking for sets, reps, and session notes, so you always know where you started and how far you’ve come.
Two programs below: one for beginners working toward their first full push-up, one for intermediates building volume and strength. Both follow the same core rule: train push muscles 2–3 times per week, rest at least one day between sessions, and only advance when the criteria are met.
Train 3 days per week (e.g., Monday, Wednesday, Friday). Each session takes 15–20 minutes.
This structure aligns with practical beginner programs that combine planks, incline variations, and negatives to build toward a first full push-up in roughly 8 weeks for consistent beginners.
Train 3 days per week. Alternate a “skill day” (more reps, slightly easier variation) with a “strength day” (harder variation, slower tempo) within each week. This approach reflects resistance training research showing that planned variation increases adaptation and adherence compared to linear-only programming.
Push-ups demand more than chest and arm strength. Core stiffness, scapular control, and triceps endurance are the three most common limiting factors, and NASM’s push-up coaching framework places scapular stability and core bracing on equal footing with upper-limb strength. Neglecting these is why many people plateau at knee push-ups or develop shoulder discomfort when they try to progress.
Here are the accessory moves worth adding to your weekly sessions.
Front plank progressions — Start with a 20-second hold on elbows and toes, building to 45–60 seconds. Once that’s solid, progress to a straight-arm plank (push-up top position) held for 20–30 seconds. This directly trains the midline stiffness you need to keep hips level during push-ups. Pair this with the beginner core workout for a complete midline routine.
Scapular push-ups — In a straight-arm plank, let your shoulder blades pinch together (retract), then push them apart (protract) without bending your elbows. Do 2 sets of 10 reps. This isolates serratus anterior function and teaches the scapular control that prevents shoulder impingement as you progress.
Hollow-rock variations — Lying on your back, press your lower back into the floor, arms overhead, legs straight and slightly raised. Rock gently back and forth. Two sets of 10 rocks builds the anterior core tension that directly transfers to a stiff-pillar push-up position.
Bench dips — Hands on a bench behind you, feet on the floor, lower and press. Three sets of 8–10 reps build triceps strength that pays off in the lockout phase of every push-up.
Banded chest press — Loop a resistance band around your back and press forward from a standing or seated position. Two sets of 12–15 reps add horizontal pressing volume without the spinal load of a push-up, useful on recovery days.
Eccentric negatives as accessory work — Even after you can do full push-ups, adding 2–3 sets of 5-second negatives as a finisher builds the eccentric strength that makes your reps more controlled and reduces injury risk.
Top-of-push-up isometric holds — At the top of a push-up, hold for 3–5 seconds before each rep. This builds the endurance to initiate the concentric phase cleanly, which is the missing piece for many beginners who can lower themselves but can’t press back up.
Programming placement: Do accessory work after your main push-up sets, not before. Two to three sets per exercise, two to three times per week, is enough. When you’re earlier in the progression (Levels 1–3), prioritize core and scapular work. As you reach Levels 4–6, shift toward triceps and eccentric loading.
Pro Tip: The single fastest way to improve midline stiffness for push-ups is to squeeze your glutes and brace your abs simultaneously at the top of every rep, as if you’re about to take a punch. Hold that tension for the entire set. Most beginners brace at the start and release halfway through, which is exactly when the hips sag.
Getting the movement right protects your shoulders, wrists, and lower back while making every rep more effective. These are the faults we see most often, along with immediate corrections.
For wrist pain, fist push-ups and push-up handles are the most practical solutions. Both keep the wrist in a neutral position and reduce the compressive stress that causes discomfort. Incline variations also reduce wrist load because the angle of force changes.
For older adults or anyone returning from a long break, higher inclines and isometric holds are safer starting points than knee push-ups. More time at each level, more rest between sessions, and a greater emphasis on scapular control drills will produce better long-term results than rushing the progression.
Injury red flags to stop and consult a professional: sharp pain in the shoulder joint (not muscle fatigue), numbness or tingling in the hands or fingers, sudden loss of shoulder range of motion, or pain that persists more than 48 hours after a session. These are not normal soreness and should not be trained through.
When any of these appear, regress immediately to a pain-free variation and prioritize scapular depression and retraction drills before reloading. NASM’s coaching framework emphasizes scapular control as the foundation of shoulder-safe pressing, and that principle applies at every level of the progression.
A systematic review of push-up kinetics covering 46 variants found measurable differences in load and spinal compressive forces across variations, which is why hand position and torso angle matter not just for muscle emphasis but for injury prevention.
The stepwise approach isn’t arbitrary. Two training principles explain why it produces results, and the research on push-up biomechanics shows exactly why each level in the progression earns its place.
Progressive overload means consistently increasing the demand on your muscles over time, whether through more reps, harder variations, slower tempo, or reduced rest. Without it, your body has no reason to adapt. The SAID principle adds specificity: your body adapts to the exact demands you impose, not to general effort. Training wall push-ups won’t build the strength for a full push-up because the load and movement pattern are too different. Moving through the progression levels keeps the demand specific and progressive at every stage.
This finding has direct programming implications. Narrow hand placement targets the triceps and pectoralis major more intensely, making diamond push-ups a genuine strength tool rather than just a variation. Forward and backward hand shifts raise abdominal and back activation, which is useful for core development but requires caution for anyone with lower-back sensitivity. The ascending (pressing) phase demands more from your muscles than the lowering phase, which is why negatives are so effective: they extend time in the hardest part of the movement.
The NSCA biomechanics research on load across variants gives coaches a practical tool for selecting regressions. Knowing that knee push-ups sit at roughly 49% of bodyweight load and standard push-ups at about 64% means you can prescribe the right variation for a given strength level rather than guessing.
Stalling on a level for more than two to three weeks is frustrating, but it almost always has a fixable cause. Here’s how to diagnose and address the most common ones.
You’re not training frequently enough. Push-up strength responds well to frequency. If you’re only training once a week, your nervous system doesn’t get enough practice to consolidate the movement pattern. Move to 3 sessions per week, even if the volume per session is lower.
You’re always doing the same thing. Repeating identical sets and reps week after week stops producing adaptation. This is the SAID principle working against you: your body has already adapted to that exact demand. Add a tempo variation (3-second descent), a pause at the bottom, or swap one session for a slightly harder variation to reintroduce a new stimulus.
Your accessory work is missing. If your core gives out before your chest and arms, no amount of push-up practice will fix the plateau. Add front plank progressions and hollow-rock holds to your weekly routine. Weak scapular control is the other common culprit: two sets of scapular push-ups per session often breaks a plateau within two weeks.
You’re not recovering enough. Two consecutive days of push-up training without rest leads to accumulated fatigue that masks real strength. Take at least one full rest day between sessions. If soreness hasn’t cleared within 48 hours, that’s a signal to take an extra day or swap to a lighter accessory session.
You’re advancing too fast. Moving to a harder variation before you’ve truly owned the current one means you’re building on an unstable base. Go back to the previous level, hit 3 sets of the target reps with perfect form on three separate sessions, then retest the harder variation. Consistency at a level you can own beats struggling at one you can’t.
Sport-specific athletes, including surfers, can also use push-up progressions as part of a broader cross-training program to build the pressing strength and shoulder stability their sport demands.
The most common thing I see with beginners isn’t a lack of effort. It’s a lack of patience with the process. Someone does three sessions of knee push-ups, decides they’re “too easy,” jumps to full push-ups, and then wonders why their form falls apart after rep four. The progression exists for a reason. Each level is building something the next level depends on.
The habit change that helps most people isn’t a new exercise. It’s logging every session. When you write down “3x8 knee push-ups, felt solid” and then look back three weeks later and see “3x10 with a 3-second pause,” the progress becomes real and visible. That visibility is what keeps you consistent when motivation dips.
Timelines vary more than most guides admit. Some people get their first full push-up in four weeks. Others take twelve. Neither is a failure. What matters is that each session is slightly better than the last, even if “better” just means the same reps with cleaner form.
Guided plans and built-in tracking, like what Onemor offers, make this easier because the structure is already there. You don’t have to decide what to do next. You just show up and follow the session. For beginners especially, removing that decision fatigue is often the difference between staying consistent and drifting away from the program.
Knowing the progression is one thing. Following it consistently, with the right cues at the right time, is where most people need support. Onemor gives you exactly that: coach-led sessions with built-in sets, reps, and rest timers so you always know what to do next. Every session is guided by a real trainer, and the app tracks your progress so you can see exactly when you’ve hit the 3-set advancement criteria.
For beginners working toward their first push-up, Onemor’s bodyweight programs walk you through each level with form cues and progression checkpoints built in. For intermediates adding volume and variation, the structured weekly plans remove the guesswork from programming.
Start your first session on Onemor for free, or check out Coach Branden and Coach Kayla for trainer-led beginner and intermediate programs. You can also join an Onemor tribe for accountability and group challenges that keep the momentum going.
A complete pushup progression works because it applies progressive overload and the SAID principle at every step, with clear advancement criteria that prevent both stalling and rushing.
These are the core references that informed the progression structure, program design, and coaching cues in this guide.